| Hitler Parody Wiki Tutorials | |
|---|---|
| General | Index · Quick Start · Resources |
| Editors | Caption Generator · Windows Movie Maker · VideoPad · Vegas Pro (Basics · Intermediate) |
| Specifics | Chroma Keying · Rotoscoping |
| Extra | YouTube (Disputing false claims) |
Windows Movie Maker is an editing software built-in with Windows XP and Vista, and it also supports Windows 7, 8 and 8.1. However, this software is no longer available for download officially, If you have already installed, you can use it as usual, or else please consider using other editors such as Vegas Pro.
Until now, it is one of the most widely used programs to create Downfall parodies. This tutorial will explain how to use Windows Movie Maker 2.6, which many agree is better than the newer versions. It can be downloaded from the Microsoft website, if you have a newer version.
IMPORTANT: You get what you pay for! Windows Movie Maker can be very buggy on old PCs, and tends to quit responding at times. SAVE YOUR WORK OFTEN!
Step by Step[]
Import[]
When you first open Movie Maker, the first thing you need to do is import the video clips you wish to use. Choose File->Import from Movie Maker to load it for editing. It appears in Movie Maker as a series of consecutive clips. At the bottom of Movie Maker’s window is what’s called a timeline. Drag each clip, from first to last, into the timeline, keeping them in the same order.
")
")
")
Subtitles[]
Now the all important subtitles! Under the drop menu "Edit Movie", select "Make title and credits", then click "Add title on the selected clip in the timeline".
Type in what you want the subtitle to say. Click on "Change the title animation" and select "Subtitle". Then click on "Change the font text and color". Click on the "Decrease font size" key four times (That's the capital A with the arrow pointing down) and then click the bold key. The standard font, Microsoft Sans Serif, will work just fine and is preferred by many Untergangers.
Once you have created the subtitle, click and drag the ends to make it fit with the audio of your clip. Repeat this process to create subtitles for the whole video, or you can copy and paste the one subtitle as much as needed in order to avoid having to create each subtitle individually.
")
")
")
")
")
")
")
Export[]

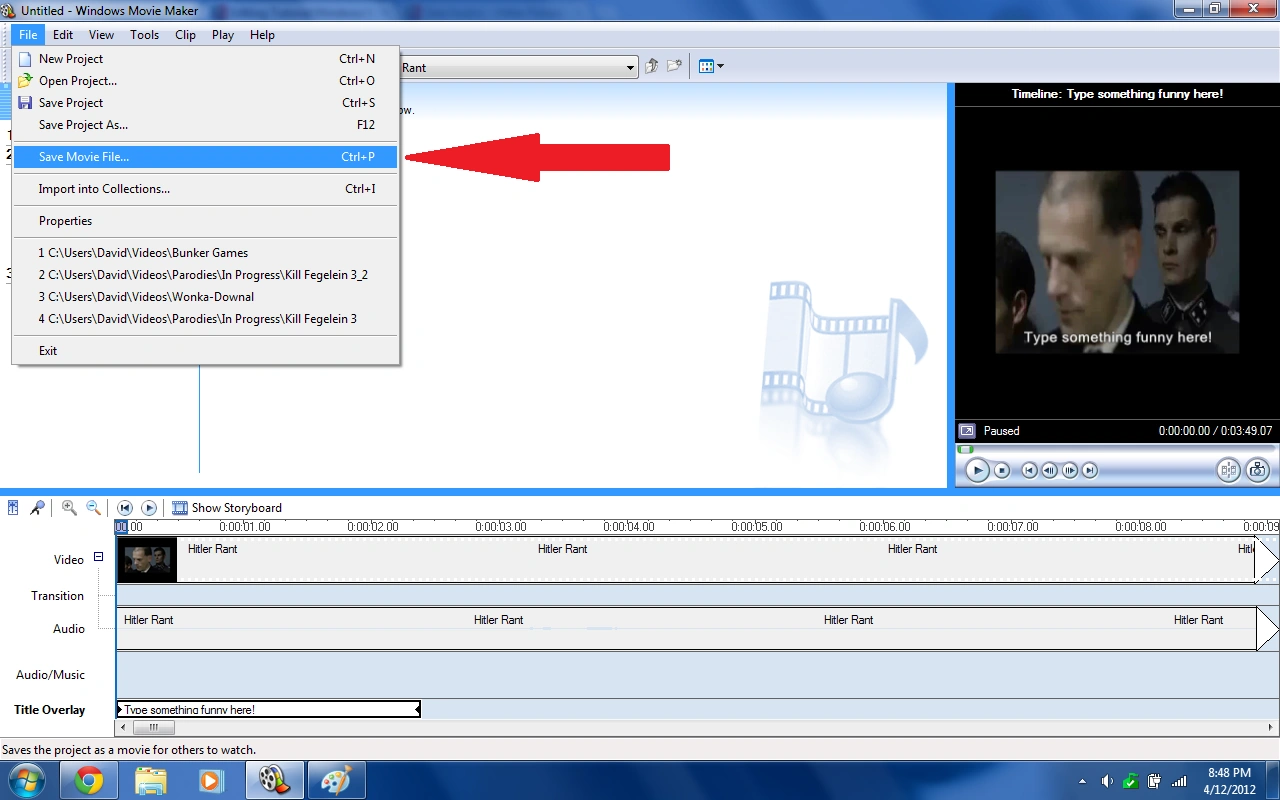
Remember, save your work first! Once you click on "Save Movie File...", simply follow the pop-up wizard.
Once you are satisfied with the comedic quality of your video, you must make a video file. YouTube does not accept Windows Movie Maker projects as a valid file format. FIRST AND FOREMOST, SAVE YOUR FILE! Movie Maker crashes most often when attempting to save a movie file, so make sure your past three hours of labor don't go to waste. Go to "File>Save Movie File..." and follow the pop-up window's instructions to save the movie file. Then upload to your favorite video sharing site!
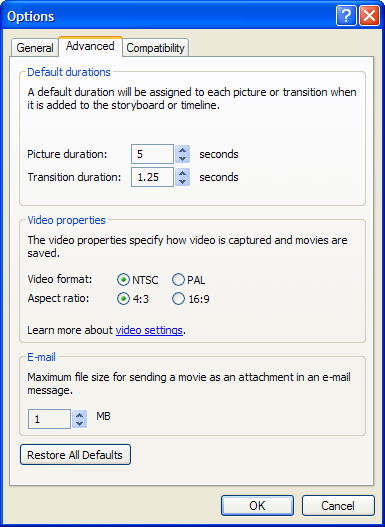
Additional settings[]
Setting the correct aspect ratio[]
In the Options dialog, under the Video properties section, change the aspect ratio from 4:3 to 16:9.